
 |
| A Burst Effect. |
 |
| Create a new document |
1. Create a new document in Photoshop. I used CS3 for this version, but this should be compatible with most of the versions from 7 up. The size isn’t terribly important. We’re doing this to learn the steps. I made mine 500×500 pixels, RGB Color mode, 8 bit, with 72 as the resolution, and the background white. See the image to the right.
2. Create a new layer. It will not need color yet.
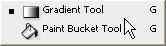 |
| Gradient Tool |
3. Select two colors for the Gradient tool. I used black and red. The tool is found by pressing and holding the paint bucket icon.
4. Choose the foreground to background style (the first to show on the menu).
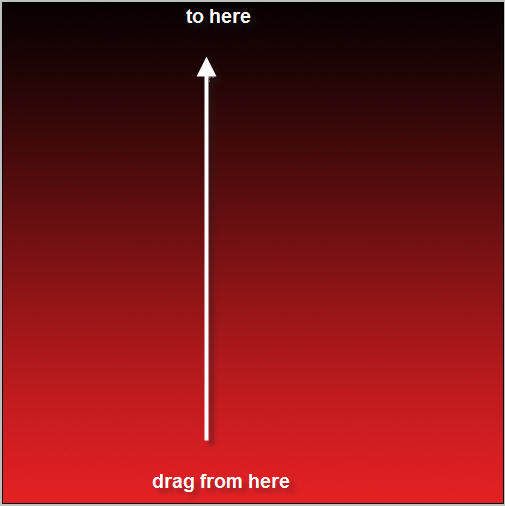 |
| Use the Gradient tool to fill |
5. Drag the icon from the bottom of the page to the top. To get a straight line, you can hold down the shift key as you drag. It will look something like the image here.
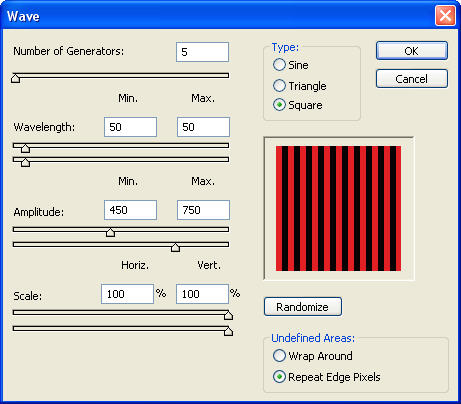
6. Select the filter menu, and then the submenu Distort. Choose Wave. Set the following parameters.
a) Set the type to Square
b) Number of generators (5). You may want more.
c) Wavelength (50 and 50)
d) Amplitude (450 and 750) HINT: if Photoshop balks, use the slider bars to help you set these numbers.
e) Undefined areas – choose Repeat edge pixels.
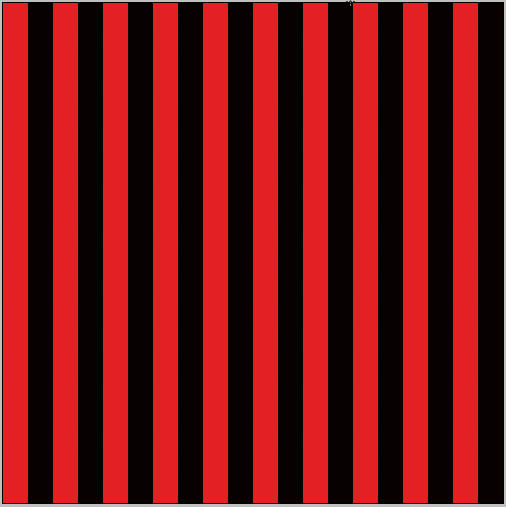
When you click OK, you will get an image that looks like this one:
 |
| Distort “Wave” |
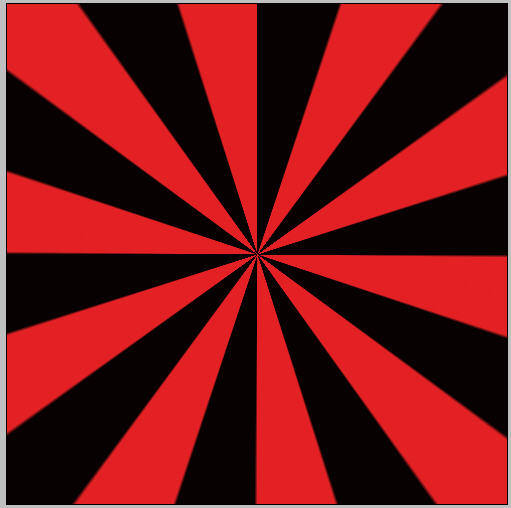
7. Return to the Filter menu, and again, choose Distort, then choose Polar Coordinates.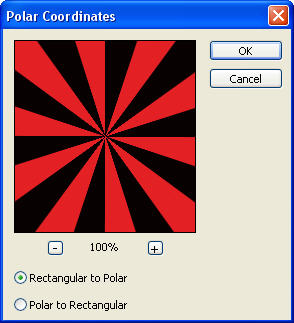 Set the coordinates to Rectangular to Polar, and press OK.
That’s all it takes to create this effect.
To download a pdf file of these instructions, click here:
How will you use your burst effect? Feel free to share a link to your artwork.
